We hosted a little Halloween party here this afternoon. I planned almost everything from ideas that I had seen on Pinterest.
 I made banana chocolate chip muffins and used these cupcakes toppers that I had picked up last year from Winners. (Made by Wilton) Want the recipe? I used my Best Banana Muffins Ever recipe found here.
 I love these stickers that Claire and I stuck to the bottom of these Hershey's Kisses. Is anyone else excited that they changed the formula for the kisses? I think they are delicious now! I found the printable here.
I baked sugar cookies on popsicle sticks and decorated them to look (sort of like) mummies. These were a big hit with the kids, I mean come on, cookies on sticks?! That's where it's at.
I put a bit of floral foam in the bottom of these containers that I picked up at Dollarama to hold the cookies.
Sticking with the mummy theme, I wrapped up a few juice packs using
white electrical tape and googly eyes. I also decorated cookies that had
been cut with a gingerbread cookie cutter to look like mummies. I used
M&M's for the eyes.
One of my favorite things that I made was this banner. I used my
cricut to make it. I cut 5" circles out of black cardstock, and then cut
all of the letters on white paper, using my Opposites Attract
cartridge.
I've seen a few variations of this on Pinterest. I didn't want to have to cut everything by hand, so I cut the only shapes that I could find on Cricut cartridges. Luckily, my friend Sylvia, had a few cartridges that I could borrow. I taped all of the black paper to some fishing line and hung them up between the two posts.
A while ago, I placed another order from Bargain Balloons. I went in on an order with a friend so that we could split the flat shipping rate. I just love the selection of balloons, and you cannot beat their prices. (That is not an affiliate link. Bargain Balloons don't know who I am, I just love their site!)
My last bit from the party was another printable that I found on
Pinterest. (Seriously, where did I come up with ideas before Pinterest?)
The tags say "A bit of light for Halloween night." I found this
printable here.
Claire was dressed up like a horse. (Lucky find this summer while my sister and I were yardsaling!)
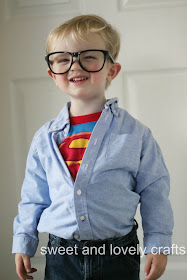
Simon was dressed up as Super Simon, cute kid by day, and superhero by night!
Linking up with: Six Sister's Stuff & Skip to my Lou & Tip Junkie & Tatertots and Jello


