Monday, February 28, 2011

Claire's Rainbow Birthday party

I cannot believe that Claire's three. I know everyone says it- but seriously, where does the time go? She's growing (& learning) so fast. She makes me laugh so hard every day. Claire loves rainbows now. We spend a lot of time gathering cd's and trying to reflect the light to make rainbows on the ceilings. We were reading a book last week and Claire asked me why there was no indigo in the rainbow. I think that she's 3 going on 10.

We just had a small party since Claire prefers smaller groups of people. But I am excited to have larger parties in the years to come because I had so many ideas that I wanted to use here, but couldn't justify making all of these rainbow foods for just a few people.

This was such a fun party to plan. Here's the pic of the table. I served fruit kabobs, and heart peanut butter and jam sandwiches. (Close up shots of the details below.)

The cake came out so well. I was so worried that something would go wrong with it. I used this cake recipe from Whisk Kid. I used my own butter cream icing recipe though. I'm not going to lie- it took a lot of icing. If I could offer one bit of advice to anyone who wants to make this cake- make sure your layers look very very even before you put them into the oven. I thought that I had smoothed out my layers enough, but my purple layer was a little wonky, which kind of threw me off a bit.


Claire just loved the inside of the cake. Sometimes when you ask her what the favorite part of her party was she will tell you the rainbow cake- the other times she'll tell you it was playing with her new toys.

I just made this little rainbow coloured bunting for the top of the cake to add a little colour to it before we cut it. I cut out my triangles out of cardstock and glued them onto my awesome Twinery twine. Then I just tied them to some bamboo skewers and stuck them into the cake.

 These are our rainbow fruit kabobs. Of course, these are missing a few colours since there isn't a purple or indigo coloured fruit (that I could think of anyway)!
I love making labels for the water bottles for Claire's party. (Even though,  I would never otherwise buy bottled water.) I had received a pack of digital papers from Lesley Grainger (I love her designs!) a little while ago, and so I used that paper for my background (red and white polka dots). Then I just added in the white circle, text, and rainbow in picnik. (Although if you're looking for the rainbow in picnik you won't find it because I designed it myself.)

I used a 2 1/2 inch scalloped circle punch to punch out circles of paper (naturally all in rainbow colours) and then I sewed them together to make a garland to hang up. (Easy to tell I'm a novice sewer with all of those crooked lines- isn't it?!)

 I used my cricut to cut out these letters. Claire 'helped' me.
 And here she is, my little big Birthday girl. I will be so happy when she just gives into me and starts to cooperate with the camera :)
 And for good measure, a new pic of Simon. My sister pointed out that the kids have the same expression in these pics. I made this shirt for Simon using this tutorial here. It's so cute, I need to make him more shirts in different colours.


Friday, February 25, 2011

I'm busy gathering all of the finishing touches that we need for Claire's rainbow themed Birthday party tomorrow! Will have more posts lined up for next week with more details! Wish me luck that I get the cake done without any major issues!

Sunday, February 20, 2011

wee little shamrock men

 
 Claire and I had such fun making our Valentine's Day craft that I wanted to make one for St. Patrick's Day that used similar materials. We made a few different varieties this year- so you can make which ever one you have the materials for.
 What you need to make these: (this is a list for the supplies to make all of them)
toilet paper rolls
construction paper & foam (we used two different colours of green)
white computer paper

markers/crayons (not pictured)
googly eyes (older kids could draw on the eyes)
decorative tape or strips of coloured paper (could use leftover wrapping paper)
scissors
paint & paint brush
glue
paper trimmer
shamrock template (I used this one)

                          1                                                        2                                                       3

For shamrock #1
1. cover the toilet paper roll with white paper
2. decorate with green masking tape (you can buy green electrical tape at the dollar store)
3. using green foam (or construction paper) cut out a shamrock
4. glue eyes onto the shamrock
5. tape the shamrock onto the toilet paper roll
6. cut a strip on construction paper and fold it like an accordion, glue it to the side of the roll

For shamrock #2
1. have child paint a piece of white paper & let dry
2. cover the roll with piece of painted paper
3. using green foam (or construction paper) cut out a shamrock
4. glue eyes onto the shamrock
5. tape the shamrock onto the toilet paper roll
6. cut a strip on construction paper and fold it like an accordion, glue it to the side of the roll

For shamrock #3
1.have child draw & colour on green construction paper
2. using green foam (or construction paper) cut out a shamrock
3. glue eyes onto the shamrock
4. tape the shamrock onto the toilet paper roll
5. cut a strip on construction paper and fold it like an accordion, glue it to the side of the roll

If you're using construction paper to cut out the hearts, you will need a stick to help support the shamrock. The googly eyes will weigh it down.  No big deal, just tape a stick to the back of the shamrock, and add a piece of tape on the inside of the toilet paper roll too.
Have you made these with your kids to celebrate & decorate for St. Patrick's Day? Leave me a note in the comments, I'd love to see them.


Linking up with So You Think You're Crafty & Skip to my Lou & Molly Moo & Tatertots and Jello & What Allie's Making Now & Somewhat Simple & ABC and 123 Learning & Today's Creative Blog & Making the World Cuter & The DIY Home Sweet Home Project


Wednesday, February 16, 2011

signed photo mats

 
 When Derek and I got married five years ago, I decided that a traditional guest book wasn't for us. After all we were having a small wedding (just 50 people) which I'm sure would have just filled 2 pages in an entire guest book. So, I picked up a photo mat, and frame and had all of our guests write their well wishes for us, and sign the photo mat. I know that photo mats aren't so new anymore (although they definitely weren't this common 5 years ago!) but I learned a few things from our wedding frame. So, if you're doing a signed photo mat use a low tack tape (painters tape) to cover up the part of the photo mat that will be hidden by the photo frame. Just pop the glass out of the frame, put the photo mat behind the frame, and a make a small mark with a pencil on each side of the photo mat. Then cover with tape so that no one signs too close to the edge. Some of our wedding wishes were a little cut off. Also, all of my favorite wedding pictures were taken in portrait mode, so I wish that I would have had the mat cut the other way. I don't know what I was thinking when I had it cut that way.

When Claire was born, I decided that I wanted to have another signed photo mat of all of her first visitors. I even remembered to take it to the hospital to have my Doctor and nurses sign it. My only regret is that I didn't buy more than one frame, because I searched high and low for the same/similar frame for Simon and the one that I ended up buying is quite a bit smaller than Claire's. Right now I have all of the frames hanging in the living room, but eventually I'll move the kids frames to their rooms as a reminder to them who was there to help celebrate their birth.

Linking up with Somewhat Simple

Sunday, February 13, 2011

bird seed wreath

More snow = more outdoor activities. This time Claire and I made a birdseed wreath. I've seen these made all over blogland where the people used cookie cutters to make the bird feeders but I wanted to make one larger bird feeder. 

What you need:
3 cups of birdseed
2 packets of gelatin
cake pan to form the wreath
non stick spray 

small container to form the hole in the wreath (not pictured)
piece of fabric to hang the wreath, I used an old dress shirt (not pictured)

I used the instructions found here. Sprinkle two packages of gelatin over 1/2 cup cold water. Let it sit a couple of minutes until gelatin has absorbed the water. Heat 1 3/4 cups water in a pan, then add in the gelatin mixture. Stir until dissolved. Stir in 3 cups birdseed. Allow mixture to cool until gelatin is thick and coats all the birdseed. (I think that I should have let the gelatin thicken a bit more before I put it in the pan.)

I sprayed the cake pan, put a small container in the middle of the pan and then poured dumped in the birdseed mixture. I put the pan outside the back door so that it would harden quickly. Then, I just ripped a strip off of the old shirt and used that to hang up the wreath.


 The birds loved it. We saw chickadees, bluejays and

 even a few woodpeckers. Now, I'm not sure if our wreath didn't really hold up because it was so large (maybe there's a reason why everyone used small cookie cutters), or if it was because the woodpecker chewed through the wreath. However, as it turns out, the birds don't seem to care if the wreath is hanging on the tree, or laying on the ground- lucky for us I guess!
  

Wednesday, February 9, 2011

coloured ice blocks


 Well, the snow just keeps on coming here. I am so ready for summer to some, but apparently that doesn't seem to matter much to Mother Nature. I saw this idea on Craftberry Bush and I thought that it looked like so much fun. She made her own molds out of tin foil, but I had quite a few muffin/cake tins that I knew would be perfect for this. Even standard muffin tins would be nice. 
 I just filled the tins with water and added a few drops of food colouring to each cup. Since it is so cold here, I just put the tins outside to freeze, since they would have taken up a lot of room in the freezer.
 This was a fun winter activity for Claire and I. I got to take loads of pretty pictures, and Claire got to play with blocks of pretty ice. I would like to suggest that if you are going to do this with a toddler, and you would like to take photos of the blocks of ice, (much like myself) do it during naptime! All I wanted to do was arrange the ice and  take pictures, and all Claire wanted to do was play with it.


Linking up with Red Ted's Art Blog & ABC and 123 Learning & Tatertots and Jello & Somewhat Simple

Monday, February 7, 2011

snow castle flags

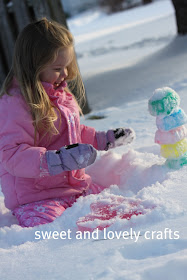
We have had SO much snow lately that I've been trying to think of things that Claire and I can do outside. When I went to Dollarama the other day they were starting to put all of their summer toys out (a tad early if you ask me!) All summer long Claire loved playing in her sandbox building sand castles, so I picked up a couple of new sand castle buckets so that we could make some snow castles. Of course, a snow castle wouldn't be complete without some flags on top of the castles.
 They were so easy to make too. I had everything that I needed to make them already at home.

masking tape (electrical tape comes in lots of colours of you don't have coloured masking tape)
lollipop sticks
scissors
Just wrap the tape around the stick and then cut a dart out of the tape.
 Then, head outside and build a little snow city. We'll probably have to start all over tomorrow, since we're supposed to get another 15 cm of snow tomorrow!

 Linking up with Tatertots and JelloSomewhat Simple & Today's Creative Blog & The Trendy Treehouse & ABC and 123 Learning

Sunday, February 6, 2011

gumdrop Valentine's Day wreath

 I made this gumdrop wreath for Christmas but I love it so much that I couldn't bear to take it down already.
I've seen these wreaths made a variety of ways. When my sister and I made ours we broke toothpicks in half and used those to secure the gumdrops to the wreath. I've seen these made where the gumdrops were secured to the wreaths using a hot glue gun. Each ways have their perks. If you use a hot glue gun your fingers will thank you. If you use toothpicks you can turn your Christmas wreath into a Valentines day wreath!