Wednesday, October 27, 2010

Mini Rustic Apple Tarts


When I first made this recipe, it was for one large tart. It also called for the apples to be sliced, but I found that there was too much juice in the apples which made the tart very soggy.Since I was making these for a playdate I decided to make mini apple tarts and they were a huge hit.

Rustic Apple Tarts

4 large tart green apples, peeled, shredded (squeeze most of the juice from the apples)
1 tablespoon lemon juice
2 tbsp granulated sugar
1/4 cup plus 2 tbsp light brown sugar
1/4 cup flour
1 teaspoon cinnamon
2 tbsp butter, softened
9" one crust pie pastry, unbaked (In the interest of time, I used a Pillsbury crust!)

Combine brown sugar, flour, cinnamon in small bowl. Cut in butter. Set aside.

Toss together apples, lemon, and granulated sugar.

Roll out pastry and cut into 2 1/2 inch circles.

Place pastry circles into a mini muffin pan. Drop a dollop of the apple mixture in each muffin cup. Top with a sprinkling of cinnamon sugar mixture.

Bake at 400 degrees F until pastry is golden brown and apples are tender, for about 25 minutes. Cool tarts on wire rack 10 minutes, serve warm. 


My sister and I came across this post on Bakerella's site, and we decided to make the apple tarts into apple pie pops. Now I want to try this with other kinds of pie too.

Monday, October 25, 2010

Fall pics

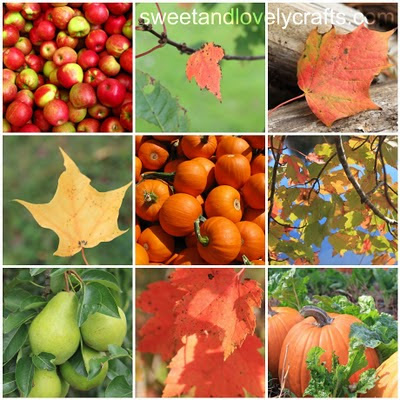
I love taking pictures in the fall. This was my first fall with my new camera and I was so excited to get out and take pictures. I read that the best time of day to take amazing fall photos is first thing in the morning, and just before the sun sets. BUT with two little kids that was a little tricky to accomplish this year. I settled for pictures whenever we managed to get ready and get out for walks. There's always next year!

Sunday, October 24, 2010

Pumpkin face jars

To go along with my lovely new piece of subway art, I made these pumpkin face jars too. I followed the tutorial that I found here. I ended up buying some jars since I didn't have any around the house, and I didn't want to wait until I had eaten enough pasta sauce and pickles to have to make these! I think that the next time that I make some of these, I'll make some using Halloween silhouettes. Witches, bats and pumpkins would look nice too.

Wednesday, October 13, 2010

Halloween Subway Art

I was so inspired when I saw this piece of Halloween subway art over at Tatertots and Jello, and also this one at A Glimpse Inside that I knew I had to make one of my own.

I went to my building supply store and pick up a shelf, 12 x 60, for just $4.99. They'll cut the wood for free, so I asked them to make two cuts. I ended up with two pieces of wood 12 x 24 and one 12 x 12. I painted a piece black, and then started cutting out some words using my cricut cutter. Now, while I really liked the look of just using orange and white letters, I couldn't restrict myself like that!

Once I had all of the words cut out, I placed them on the board, and rearranged them until I was happy with how they looked. Then I grabbed my Mod Podge and starting sticking the letters down. I took the words off one at a time, painted on a coat of Mod Podge, and placed the letters back down. I slathered on a protective coat of Mod Podge once the project was done- mostly to protect it from my kids!

I'm so happy with how it turned out, and I'm already thinking of the possibilities of one (or two!) to make for Christmas.


Related Posts Plugin for WordPress, Blogger...