Wednesday, November 27, 2013

footprint Santa & Rudolph

I love Christmas crafting. Surprise! This is one of my favorite crafts because one footprint is Claire's and one is Simon's. I love that the project incorporated both of them on the same paper.

To make the Santa, I paint the heel of Claire's foot cream colour and the rest of her foot red. Then I painted Simon's foot brown and stamped it next to Claire's footprint. Note: When you're doing this try to make sure you line up the toes of the footprints, otherwise you'll end up making stairs for Santa and the reindeer to walk up :) After I stamp their feet on the paper I have a face cloth right next to me to wipe the paint off of their feet. I always use Crayola paints and it wipes right off. We usually head up for a bath shortly after these projects so that I don't have to worry about getting all of the paint out in between their toes.

Once the paint was dry I started to create the reindeer. I used a brown Crayola marker to draw antlers, ears, arms, and a tail. I used a red marker to draw boots and a smile and a blue one to dry a hat. I added some googly eyes and a sequin for the nose, it is supposed to be Rudolph after all. Then I cut up some patterned paper so that Rudolph could carry some presents. Now while I think that the reindeer looks wonderful, Claire (she's 5) feels like he's not authentic. "Mommy, Rudolph doesn't wear boots or a hat and he DOESN'T carry presents. That's Santa's job." So maybe consult your little ones as to whether Rudolph wears boots and a hat :)

For Santa, I used a black marker to drawn Santa's boots, belt and nose. I used a red marker to draw Santa's hat, smile and arm. I drew his mitten and toy bag with green markers. I glued a sequin on Santa's belt and added some googly eyes. Then I ripped apart a cotton ball to make Santa's beard, the fur on the top of the hat and the ball on the end of the hat.


Monday, November 25, 2013

Winter lunches

 I love Christmas time. I'm so excited to be making new winter/Christmas themed lunches. I just wish it wasn't so cold here! My hands still haven't warmed up after dropping Claire off at school.

About a year ago I had picked up this penquin sandwich cutter at Walmart. It's nice because if you're using square bread it just cuts the crusts off, which Claire doesn't care to eat anyway. I skewered a few blueberries, added a clementine and some chocolate goldfish to her lunch. I added a snowflake pick that I bought at the dollar store, of all places.

 I used my Wilton tree cookie cutter to cut out Claire's sandwich. I gave her some grapes, blueberries, and a few M&M's. I also added in a banana for her snack.

 I used a Wilton cupcake topper to make this lunch. I just cut the sandwich into a circle and placed the snowman on top of the sandwich. I skewered a few more blueberries and added a chocolate chip muffin. I also sliced some green and red apples for her snack.

Lastly I gave Claire a snowflake sandwich. I skewered a few grapes on picks that I bought at the dollar store. I gave her some blueberries and an applesauce ( I added a few stickers to the top to make it a bit more festive).

These are all packed in my favorite Easy Lunch Box containers. They make lunch packing so easy. The only hard part is making sure that Claire and her friend Madison have the same colour lid :)

Tuesday, November 19, 2013

reindeer sandwiches 4 ways

 I, much like both of my kids, am so excited for Christmas. I've started packing Christmas lunches already (you know, since we celebrate Thanksgiving in October). Last week was my first week making Christmas lunches, and I decided to start with Reindeer ones :)

 For my first one, I used a gingerbread cookie cutter and turned it upside down to make a reindeer. (Thanks for the idea, Martha!) I melted a few chocolate chips and piped the antlers right onto the sandwich. Then I
made my usual marshmallow cut in half with a chocolate chip for the eyes and a red smartie for the nose. I also packed some gingerbread muffins a clementine, and an applesauce (not pictured, obviously.)

 I used the same techniques on this one, I just used a star cookie cutter. I also included a clementine (my kids can't get enough of these), some red and green grapes and some red jello that I made right in the container.

 This one was so simple, it might be my favorite one! I used a large circle cookie cutter to cut out the sandwich. I used pretzel letter E's for the antlers. I cut up some strawberries and sent Claire with another clementine and an applesauce.

 I love this reindeer pick. It was from a pack of cupcakes that I picked up last Christmas season.

 I used a heart cookie cutter and turned it upside down as well. I packed some red and green goldfish crackers, some grapes and a few marshmallows for a treat (it was Friday after all!)

Tuesday, October 29, 2013

Halloween lunches part 4

 I'm almost done making Halloween lunches and it's a good thing as I'm just about out of ideas :) I can't wait to start making Christmas/winter ones!

 I'd seen this idea on Pinterest, but I have no idea who thought of it first. To make this one I had to keep the fake teeth wedged in my spice rack for a few days so that they didn't burst out of the sandwich. When I made the sandwich, I just cut a hole in the sandwich and placed the teeth in the hole. I added some grapes, strawberries and apples to Claire's lunch.

 This was my attempt at a skull sandwich. Sometimes these things turn out so much better in my head than in actual execution. I used a piece of a fruit chew for his mouth and marshmallow eyes. I skewered some grapes, added in some blueberries (and my ghost cut out of a milk carton), and a chocolate chip cookie.

 I decorated a yogurt drink again for Claire's snack. We had made pizza for supper the night before and I rolled out the extra dough, cut out some pumpkins and baked them. I included those in Claire's lunch with some shredded cheese and peperoni. She also had some clementines, grapes, and a few smarties.

I think that this lunch was Claire's favorite one. I included a gingerbread waffle and a little bit of syrup for her to dip them in. I skewered a few grapes, and added in a few blueberries and strawberries.

Thursday, October 24, 2013

thumbprint witch


So a couple of years ago Claire and I made the footprint witch craft. This year we made a thumbprint witch.

What you need:
Card stock- I used white card stock cut into 3x4 inches (hello project life insert cards)
Cream and white coloured paint
Markers
Googly eyes (optional)

Have your child stamp their thumbprints on the card stock, one on top of the other one. See picture below.


Once the paint is dry, you can start to decorate it. I started by drawing the broom. Then I used the black marker to draw the witch's arms, legs, and hat. I added some stars and hair using yellow marker. I used a fine tip marker to draw the smile and nose. I finished it off with some googly eyes. There you have it. An adorable Halloween card or a super cute Halloween project life insert :)

Wednesday, October 23, 2013

footprint scarecrow

It's been a while since I came up with a hand print/foot print craft. This was inspired by some fall clip art that I came across on pinterest. Check out the inspiration here.

This was a simple craft to make since I just had Claire paint and stamp her foot, and then I added on the details. She painted her heel and toes a cream colour and the rest of her foot green. She stamped it on a piece of 12x12 white cardstock.

Once that was dry, I drew on the details, which I did using the kids Crayola markers.  I started by using a dark brown marker to draw the post that goes from the feet into the ground. Then I used it to draw the hat. I used an orange marker to draw the arms and a light brown one to draw the broom handle.  I used a light and dark yellow marker to draw all of the straw coming out of the scarecrow. I drew a little face and some small patches on the scarecrow body.
Happy Fall!

Tuesday, October 22, 2013

halloween lunches part 3

Claire had a short school week last week because of the Thanksgiving holiday, so she only had four lunches last week. I didn't realize how similar the lunches looked until I saw them all together here! I might have to start packing her lunches the day before. It's so dark here in the mornings, it's hard to get good light to photograph them. It also speeds things along in the morning if I don't have to worry about packing her lunch as well.

See previous weeks lunches here and here. Thanks to everyone who pinned my lunches from last week. It was exciting to see them pinned so many times in just 1 week!
This was one of those mornings where I was quite rushed packing her lunch! I cut her sandwich into a circle, and cut some ghosts out of a fruit chew to decorate her sandwich. I added in some strawberries, raisins, and an applesauce.

I started by cutting Claire's sandwich into stars. I have nesting star cookie cutters, so I picked out a few sizes for the sandwich. She also had some tortilla chips and clementines. The blueberries were skewered on the skull picks that I bought from Target. I made Rice Krispie squares in a mini muffin tin to include in her lunch. I made half a batch of the Rice Krispie squares, and after I greased the pan, I shook in a few halloween coloured sprinkles. Then I smooshed in the Rice Krispie bits.

Claire really like this lunch. There was a sandwich cut in the shape of a pumpkin, with grapes and an apple on the side. I added in a granola bar (homemade) for her snack. I love all of the picks that people add to their kids lunches, but I haven't ordered any yet. I cut these ghosts out of a milk carton to add to her lunches.

Lastly, I had picked up a package of halloween rings from the dollar store. Because they're so cheap, the ring back pop off, which makes them super easy to add to lunches! They snap back on so that the kids can wear them too. I cut Claire's sandwich out in a circle and added a spider for decoration. Then she had a clementine, some strawberries, and some goldfish crackers.

All these lunches are packed in my EasyLunchboxes containers, which I just love. Everything that I send for Claire fits in this one container. It just makes it so easy! (This is not a sponsored post, I just love their product.)

Linked up with: Tatertots and Jello, Kitchen Fun with my 3 Sons, Six Sisters, Skip to my Lou

Monday, October 14, 2013

fall & halloween lunches part 2

Fall and halloween lunches continue! If you missed the first round of lunches you can check them out here. We've got a short week of school this week, since it's Thanksgiving here today. Check back in later this week to see a few halloween crafts.

No special tools required for this lunch. I just cut the crusts off of Claire's sandwich (who likes the crusts anyway? Not me.) and then cut the sandwich in half, making a zig zag cut. I just used a sharp knife to do this. Candy eyes are fine, but I prefer to cut a mini marshmallow in half and stick a chocolate chip to the marshmallow. I skewered a few blueberries, added in a few grapes and an apple.

I used a pumpkin cookie cutter to shape the sandwich. I added in a few grapes and a clementine. I drew a pumpkin-esque face on the package of peaches (packed in water). I added in a few halloween smarties for a treat.

I used a ghost shaped cookie cutter to cut Claire's sandwich and added on marshmallow eyes. I gave her a clementine, some raisins, and some tortilla chips as a treat. Lastly, I drew a Frankenstein face on her applesauce container.

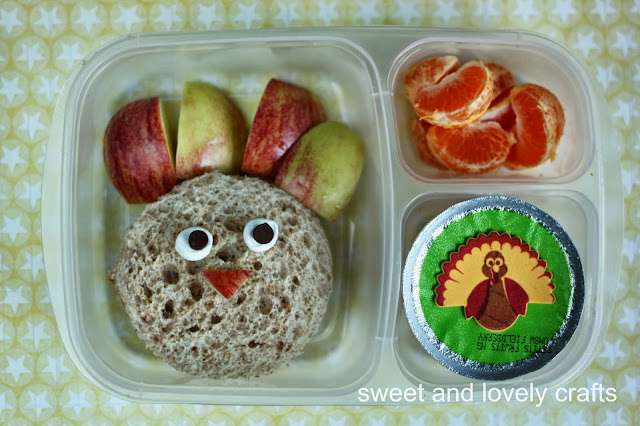
This one looked a little bit better in my head than it actually turned out- but alas, Claire ate the whole thing. The sandwich was supposed to be a turkey, as it's Thanksgiving here this week. I just put a foam sticker on the applesauce to make it a bit more festive.

This was my hand at making lunchables. I gave Claire some vegetable Breton crackers, a few pieces of ham, rolled and skewered on skeleton skewer and some shredded cheese. Because that's how Claire likes to eat her cheese, shredded. I put a little ranch dip in the container for the carrots and added in a few grapes.

Linked up with: Tatertots and Jello, Kitchen Fun with my 3 Sons, Six Sisters, Skip to my Lou

Tuesday, October 8, 2013

fall & halloween lunches


Claire just started school this year and she is loving it. She's in French immersion and it's amazing how quickly she's picking up the language. Because we live so close to the school, I get to drop her off and pick her up every day, which means I get to see my friends everyday!

Just before Claire started school, I announced on facebook how excited I was to start packing school lunches. This caused outrage, as apparently, this in not common among my friends. I don't dare announce that I still love doing it a month into it.

For the month of October, I decided to do a month of fall & halloween themed lunches. To be honest, I'm sure Claire doesn't care what the lunches look like, but it makes it more fun for me when I set challenges like this. I am using EasyLunchboxes, which I just love. Everything that I send for Claire fits in this one container. It just makes it so easy! (This is not a sponsored post. EasyLunchboxes don't know who I am, I just love their product.)

This lunch was a Wow butter sandwich (no peanut products allowed in our school), some sliced apples, pumpkin mini donuts, and an organic cereal bar for her snack. I used my Wilton leaf cookie cutter to cut the sandwich.

When I actually include an ice pack in Claire's lunch, I like to make it count. So this lunch had some star shaped, ham sandwiches, a vanilla yogurt drink, carrots and ranch dip, and some crackers.

For some reason, Claire is obsessed with these packages of applesauce. I think that she saw someone else have them at school. Probably because she can eat them so quickly and then spend the rest of her time playing. This was a sandwich cut into the shape of a pumpkin, a clementine, some chocolate goldfish crackers and an applesauce.


For this lunch I cut the sandwich into a circle. Then I used a Wilton cupcake topper for decoration on top of the sandwich. I skewered a few grapes onto the skeleton picks that I found at Target. I packed a clementine, and some oatmeal spice muffins for her snack.

Linked up with: Tatertots and Jello, Kitchen Fun with my 3 Sons, Six Sisters, Skip to my Lou

Friday, August 30, 2013

sandwich kabobs


Gah! I can't believe that it's almost time for Claire to start school. I'm trying to squeeze in as man fun things with her before school starts. Yesterday was a rainy day, but the kids were pretty excited to sit down and eat this back to school lunch.

I used these school bus print outs for a little back to school party that I hosted for Claire and a few of her friends. They are so cute. You can buy them here. They only took about 10 minutes to cut out and put the two buses together. I had cut a small piece of floral foam to fit in the bottom of the bus (for the party) and thought that I would use these again to make a lunch for the kids.

I skewered a few grapes and strawberries for Claire and Simon. I cut out a few hearts out of some brownies that I had a baked a few days ago and put those on a skewer above a strawberry. I also cut some hearts out of cheese, which would have been just as cute cut into cubes. I cut the sandwich into stars, but again, cutting it into 9 little squares would have had the same effect. You see, all food tastes better when you eat it off a stick!


Friday, August 16, 2013

back to school countdown


Day 5! I made it. Five posts in one week! This craft came together in just 10 minutes, and it's one of Claire's favorites. I'm trying to prepare Claire for school as best as I can, obviously. One thing I wanted to make clear to her was exactly when she'll be starting school. September is fairly arbitrary to her, but this chain helps her realize exactly when she'll be sitting in the classroom. (With Mommy standing outside crying.)

I used my cricut to cut out the bus. I used my cricut because if I had drawn the bus myself and cut it out, you might have thought Claire had drawn it. If you don't have a cutting machine, you could print out a picture of a bus. Or you could cut an apple out of paper. Lots of possibilities. I used red and yellow construction paper cut into 1 inch (ish) stripes of paper to make the chain. Claire liked helping with this part. It's a great opportunity to teach your kids about patterns. That's it. Every day she rips off a piece of the chain, and she's one day closer to going to school. 


Linking up with: Six Sister's Stuff &  Skip to my Lou & Weekly Kids Co-op & Flamingo ToesTatertots and Jello 

Thursday, August 15, 2013

toilet paper roll stamped apples


Back to school crafts, day 4! In just 20 short days Claire will be in school. I find that thought a little overwhelming still. Nevertheless, we're making the most of our summer. We're headed to the beach today, which the kids will surely enjoy. I am hoping that a good dose of salt water air will tire the kids out and they go to bed early tonight! 

This apple craft is so easy to make from whatever you have on hand. 

Materials:
toilet paper rolls
red & green paint
glue
any decorations that you have on hand (we used sequins, sparkles, washi tape, tissue paper & ribbon)
crayons

We used a toilet paper roll to stamp the outline of the apples. We used both red and green paint. Once that was dry Claire decorated the apples with all of the other supplies. She glued the sequins, ribbon and tissue paper balls on the apples. She used bits of washi tape to make two apples. Lastly we used sparkle glue pens to fill in two of the apples. Claire finished off the apples by drawing stems and leaves on the apples.

Wednesday, August 14, 2013

handprint paper


Day 3 of back to school crafts!! You might have to think outside of the box for this one :)
I was trying to think of all of the things that are related to school, and of course you can't go to school without paper- hence the handprint paper. 

Paint the hand white and stamp it onto a piece of paper. (I chose blue.) Once the paint is dry use a blue pen to draw the lines on the page. I used a popsicle stick as a spacer for my lines. Draw the circles for the holes in the paper. Most importantly, use a red pen to draw the vertical line on the page.

It doesn't get any easier than that. I'll be back tomorrow with another school themed craft. 


Tuesday, August 13, 2013

washi tape pencils


I love stationary. (Understatement!) What better time to celebrate my love for stationary than back to school season when all stationary is on sale!! I have a collection of washi tape now and love finding fun ways to use it.

I thought that these pencil designs would be perfect for a back to school party invite. (I will be hosting a little back to school party for Claire and her friends this year.)
  
Now I'll probably just send out an invite on facebook for the party, but still wanted to use the washi tape pencils for something at the party. They would be perfect for place settings. Just make the pencil on a smaller scale. You could also use them for labels for food items at the party. 

They're so easy to make. Look through your stash of tape and see what colours you have. Any variation of yellow tape works. Solid pink seemed to work best for the eraser bit. I used a bronzy tape for the pencil lead, but  I'm sure any dark colour would work well for that. 

What ideas do you have to make back to school fun and special for your kids? Or what did your parents do for you?

Monday, August 12, 2013

handprint crayon box!

I'm baaaaccccckkkkkk!!! Once again, I'm feeling inspired and refreshed. I've been enjoying this summer with my kids. Claire starts school in less than a month. She's ready, but I'm not sure if I'm ready for her to start school. Not having been to daycare/preschool I hope that I've given her a good foundation for school. We sat down the other day and came up with a list of foods that would be good to pack in her lunch. I'm already planning a little photo shoot at her school to get some school photos of Claire. It's just hard to believe that this time is here already!

I'm kicking off this week with a full week of school themed crafts!! Yes, a whole week of blog posts!! I know, you'll believe it when you see it. Me too.

The first one is a hand print box of crayons. Is there a more iconic symbol of school? (Possibly... check back later in the week to see what other crafts we did.) This craft however, was so easy to do. 

Materials needed:
Yellow paint, and 5 other colours of your choosing
Paper (cardstock)
Thin black pen
Thick black pen (or small sticker letters/cricut/silhouette letters)

Paint the palm of the hand yellow (I mixed in a but of orange with the yellow, just so that it's a little darker.)
The paint each finger a different colour- I let Claire pick the colours. Once that's dry, use a thin black pen to write the colours of each crayon on the fingers. If you have a thick black pen, you can use that to write the word crayons on the palm of the hand. I used my cricut to cut the letters as small as I could, and then glued them on the hand print craft. That's it!

I would love for you guys to follow me on facebook so that you don't have to miss any of my sporadic posts! You can find me on pinterest here.


Linking up with: Six Sister's Stuff &  Skip to my Lou & Weekly Kids Co-op & Flamingo ToesTatertots and Jello 


Monday, July 1, 2013

Thumbprint beaver

 It's Canada Day, and I should be hosting a Canada Day party for the kids but it has been raining here for what seems like ever now. The party was supposed to be on Saturday, but then this was the forecast. As 
 you can see it hasn't changed much since Sat. I am ready to see the sun. At least the kids won't care that the Canada Day party will be a week after Canada Day.

The kids and I made this sweet little Canada Day craft this weekend. I just started project life (it just came to Michaels stores here) and this will be a perfect craft to include in it. 

Materials needed:
brown paint
black pen & brown marker
googly eyes (optional)
piece of red paper to mount the leaf on
scissors
glue

Cut out a maple leaf, using the template link above, or draw your own leaf if you're artistically inclined at all. Have the child dip their thumb in brown paint, and stamp it twice, one on top of the other, on the maple leaf.
Once that's dry, using a brown marker, dry on little ears, legs and a tail. I used a black pen to make the x's on the tail, and draw the arms and face. Glue on googly eyes, if you're using them. I mounted the leaves of a piece of 6x4 red cardstock, because I wanted it to fit in my project life album. You can of course choose whatever size paper you want to use to mount the maple leaf. That's it. Be sure to date your project, so you can remember how little those thumbprints used to be!

Happy Canada Day!

Linking up with:   Skip to my Lou
Related Posts Plugin for WordPress, Blogger...