Wednesday, August 14, 2013

handprint paper


Day 3 of back to school crafts!! You might have to think outside of the box for this one :)
I was trying to think of all of the things that are related to school, and of course you can't go to school without paper- hence the handprint paper. 

Paint the hand white and stamp it onto a piece of paper. (I chose blue.) Once the paint is dry use a blue pen to draw the lines on the page. I used a popsicle stick as a spacer for my lines. Draw the circles for the holes in the paper. Most importantly, use a red pen to draw the vertical line on the page.

It doesn't get any easier than that. I'll be back tomorrow with another school themed craft. 


Tuesday, August 13, 2013

washi tape pencils


I love stationary. (Understatement!) What better time to celebrate my love for stationary than back to school season when all stationary is on sale!! I have a collection of washi tape now and love finding fun ways to use it.

I thought that these pencil designs would be perfect for a back to school party invite. (I will be hosting a little back to school party for Claire and her friends this year.)
  
Now I'll probably just send out an invite on facebook for the party, but still wanted to use the washi tape pencils for something at the party. They would be perfect for place settings. Just make the pencil on a smaller scale. You could also use them for labels for food items at the party. 

They're so easy to make. Look through your stash of tape and see what colours you have. Any variation of yellow tape works. Solid pink seemed to work best for the eraser bit. I used a bronzy tape for the pencil lead, but  I'm sure any dark colour would work well for that. 

What ideas do you have to make back to school fun and special for your kids? Or what did your parents do for you?

Monday, August 12, 2013

handprint crayon box!

I'm baaaaccccckkkkkk!!! Once again, I'm feeling inspired and refreshed. I've been enjoying this summer with my kids. Claire starts school in less than a month. She's ready, but I'm not sure if I'm ready for her to start school. Not having been to daycare/preschool I hope that I've given her a good foundation for school. We sat down the other day and came up with a list of foods that would be good to pack in her lunch. I'm already planning a little photo shoot at her school to get some school photos of Claire. It's just hard to believe that this time is here already!

I'm kicking off this week with a full week of school themed crafts!! Yes, a whole week of blog posts!! I know, you'll believe it when you see it. Me too.

The first one is a hand print box of crayons. Is there a more iconic symbol of school? (Possibly... check back later in the week to see what other crafts we did.) This craft however, was so easy to do. 

Materials needed:
Yellow paint, and 5 other colours of your choosing
Paper (cardstock)
Thin black pen
Thick black pen (or small sticker letters/cricut/silhouette letters)

Paint the palm of the hand yellow (I mixed in a but of orange with the yellow, just so that it's a little darker.)
The paint each finger a different colour- I let Claire pick the colours. Once that's dry, use a thin black pen to write the colours of each crayon on the fingers. If you have a thick black pen, you can use that to write the word crayons on the palm of the hand. I used my cricut to cut the letters as small as I could, and then glued them on the hand print craft. That's it!

I would love for you guys to follow me on facebook so that you don't have to miss any of my sporadic posts! You can find me on pinterest here.


Linking up with: Six Sister's Stuff &  Skip to my Lou & Weekly Kids Co-op & Flamingo ToesTatertots and Jello 


Monday, July 1, 2013

Thumbprint beaver

 It's Canada Day, and I should be hosting a Canada Day party for the kids but it has been raining here for what seems like ever now. The party was supposed to be on Saturday, but then this was the forecast. As 
 you can see it hasn't changed much since Sat. I am ready to see the sun. At least the kids won't care that the Canada Day party will be a week after Canada Day.

The kids and I made this sweet little Canada Day craft this weekend. I just started project life (it just came to Michaels stores here) and this will be a perfect craft to include in it. 

Materials needed:
brown paint
black pen & brown marker
googly eyes (optional)
piece of red paper to mount the leaf on
scissors
glue

Cut out a maple leaf, using the template link above, or draw your own leaf if you're artistically inclined at all. Have the child dip their thumb in brown paint, and stamp it twice, one on top of the other, on the maple leaf.
Once that's dry, using a brown marker, dry on little ears, legs and a tail. I used a black pen to make the x's on the tail, and draw the arms and face. Glue on googly eyes, if you're using them. I mounted the leaves of a piece of 6x4 red cardstock, because I wanted it to fit in my project life album. You can of course choose whatever size paper you want to use to mount the maple leaf. That's it. Be sure to date your project, so you can remember how little those thumbprints used to be!

Happy Canada Day!

Linking up with:   Skip to my Lou

Monday, June 17, 2013

Thomas the Train party!!

It is tough for me to keep my blog updated regularly. I hope that I still have a few readers out there! I'd love for you to leave me a comment and let me know you're still reading and following along with me, whenever I find the time to update this site.

Recently, Simon turned 3! I couldn't think of anything more suitable than a train themed party for him. He LOVES his train set, and pretty much everything that's related to Thomas. We had a quiet little party this year, with just 4 party guests.

I had been picking up Thomas books at a second hand shop so that I could make a little banner for Simon's birthday. I ended up with enough, that I made two banners. They turned out to be Simon's favorite part of the party! He was so excited to see all of his favorite trains on the banner.The banners have since been relocated to his room.


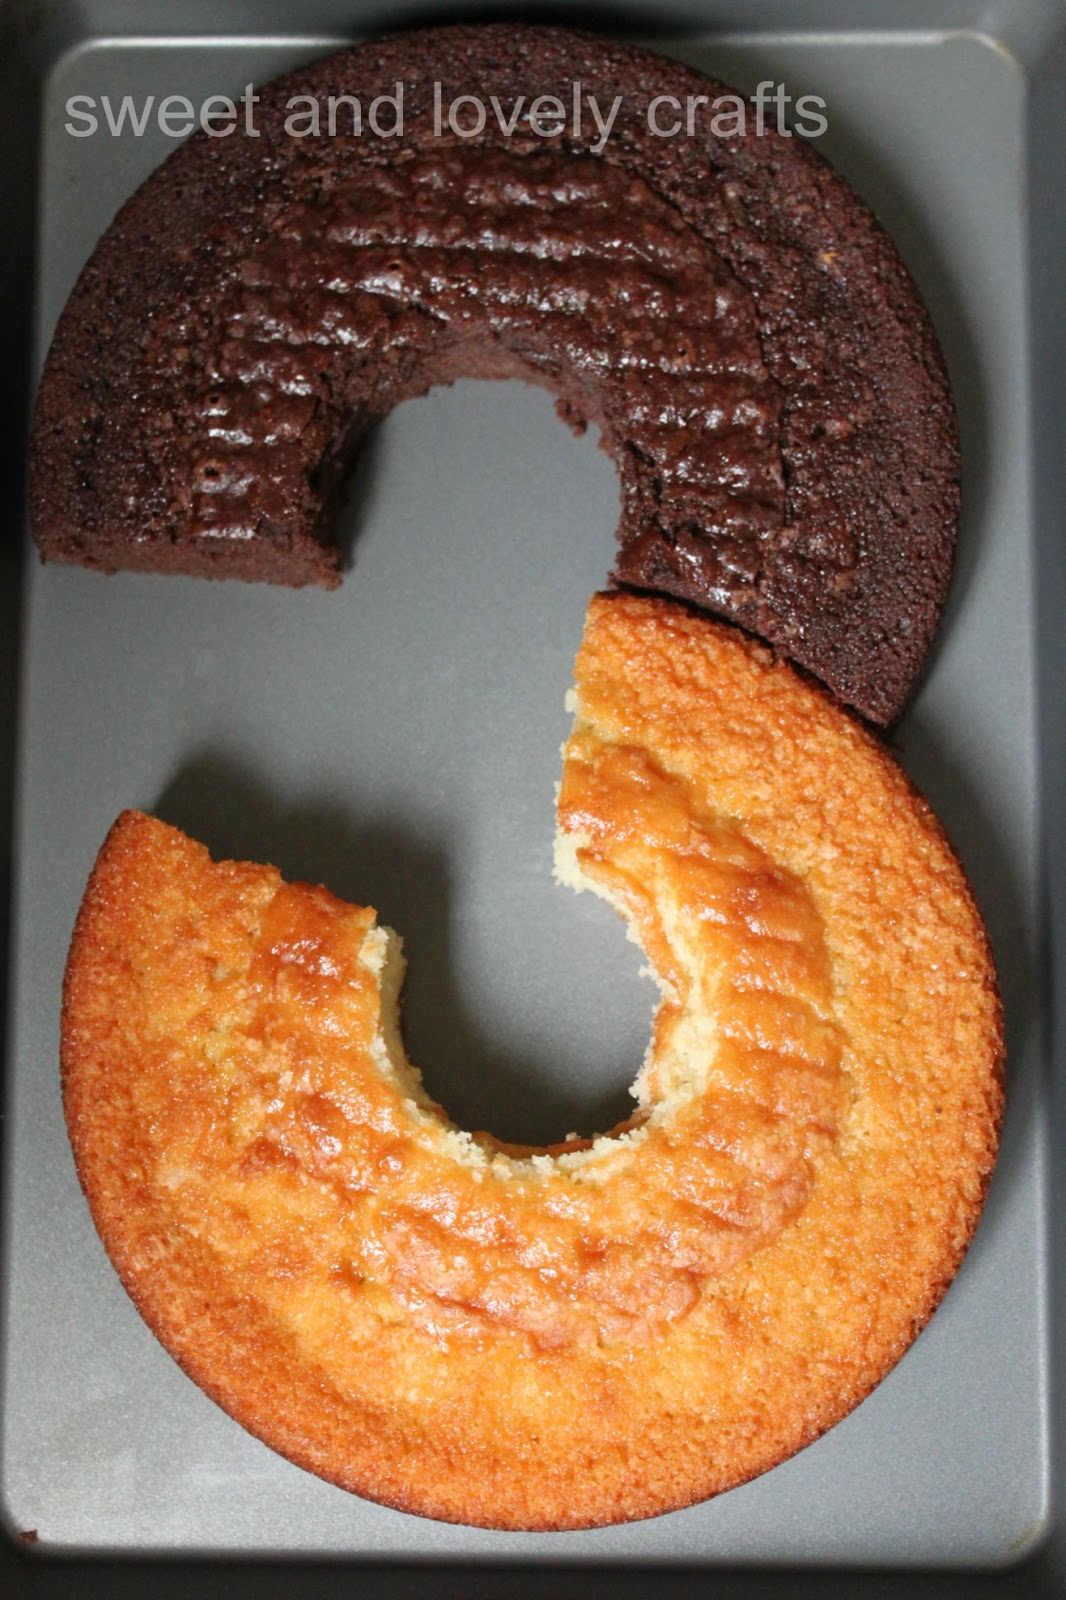
 I made two cakes for this party, a chocolate and white cake. I baked them both in a round cake pan. Then I used a large circle cutter to cut a circle out of the middle of each cake. I made a template for the cake, and then cut a section out of each each. My sister used the chocolate cake leftovers to make cake coal pops.

I covered the cake with green icing, and lined it with kit kats to look like train tracks. Then I placed a few trains along the track.

 I created a little Thomas cover for the juice boxes, so that all of the juice packs would look like Thomas trains. If you're interested in the template, just let me know and I can add it to this post.

One of the girls at the party is gluten free. I made some gluten free graham crackers, and the kids loved them. I also made gluten free gingerbread muffins which were a big hit.

 For lunch we made pizzas on gluten free tortillas, with peperoni cut into the shapes of trains.

I attempted to cover the table and make it look like a big Thomas. It didn't turn out quite how I had envisioned it though!

 Simon hasn't quite mastered the art of blowing our candles yet, so I had to help him out a bit.

I used one of my old Ikea side tables for the kids to eat at. They love sitting in the little chairs!

I covered the table with kraft paper, and used electrical tape to make the train tracks.

Here's a pic of the second banner that I made for Simon.

This game was a big hit with the kids. We played toss the coal into Thomas' coal tender. (Simon later informed me that Thomas does not have a coal tender. Guess I should have checked with him first!) My sister filled black balloons with rice and then tied them off- that was our coal. Using the train tracks that I had made on the floor, we tried to use those as a guide for where the kids should stand to toss in the coal. Turns out 3 year olds are a bunch of cheaters, and they all moved as close as they wanted to Thomas to toss in the coal. It doesn't matter, they all had so much fun playing this game!

I opened up two diaper boxes, painted the inside blue, and then folded them back up into boxes. I painted the inside so that I'd only have to do one coat of paint. I used electrical tape to make the designs on the side of Thomas, and printed out a Thomas face for the front of the box. I cut a hole my husband cut a hole on the top of the tall box, for the coal.

Here's cheater Simon birthday boy Simon tossing in the coal.

And that's it. He (and Claire) loved the Thomas birthday party. Fun was had by all!

Thursday, April 11, 2013

polar bear birthday!


 Claire's birthday party was actually back in February, but I'm just getting around to posting about it now. 
She insisted on a polar bear themed party. WHY can't she choose easy party themes??  Last years party was a giraffe themed one. Anyway, it doesn't really matter, I love planning parties. I had lots of fun thinking of polar bear things that we could do and decorate with.

I have no idea why it never occurred to me to string balloons on fishing line and then hang them up. That's what I did here, and it worked so well. Then Mom and I twisted lengths of streams to go behind the food table.
Our party was quite small, so I don't make too much food.

I had some Hershey's Kisses that I added a few stickers to the bottom of. I used the 4th of July ones found here. Obviously I just used the blue ones, and saved the rest of the sheet for another project. That I haven't created yet.
I made homemade timbits mostly so that we could play a game with them. I will post the recipe for these shortly- they are so good!

In an attempt to stick with the polar bear theme, I made an igloo using blue jello and some icing. I think that I used 4 packages of jello, and half of the required water (so that they were more like jello jigglers). Then my sister lovingly piped the white lines on the igloo.

I wrapped the juice packs that I picked up with a sheet of white paper. I added googly eyes, and a small heart that I had cut out with my heart punch from a piece of black paper. I used a black pen to draw the mouth, and then added the ears that I had punched using my circle punch.

I baked these graham crackers on sticks, because everything is so much more fun to eat on sticks!

And here's the cake. I was so excited to see that Martha Stewart had created a bear template for a cake. I have used Martha's template in the past to make Claire's giraffe cake. I used a board that I had in my house, leftover from a craft project. It wasn't quite long enough, so I did end up making the arms a little bit shorter so that they would fit on the board. I also used a butter cream recipe, so that I wouldn't have to try to refrigerate it.

My sister in law cut these polar bears out with her cricut. (I love my cricut, but I still have the old school one, so it only cuts 6x12 paper! She cut these ones to be much larger.) I taped a string along the back of them and hung them over the streamers.

This was my sad attempt at drawing a pin the mitten on the polar bear game. My sister and I drew it, and Claire decorated the bear. 

We also played another game, but I can't seem to find any pictures from it. I used my homemade timbits, and strung them on a long piece of string. My sister did this ten times, one for each party guest. When all of the timbits were on the strings, we hung them from a broom handle. The kids had to try to eat the timbits snowballs without using their hands. It's a fun game, the kids always love it. 

This was one of my favorite parts of the party. For the party hats (and doubling as the party favors) my Mom knit a polar bear hat for each child. Mom used the free pattern found here.

I can't believe that she's 5!! She starts school this year! Happy Birthday my little big Clairity Boo!

Friday, April 5, 2013

best oatmeal spice muffins


I found my new favorite muffin recipe!

My friend Hannah started a blog when she inherited a cookbook from her father in law. The cookbook (of all muffin recipes) belonged to his Mom. She began baking a new recipe each week, and then blogging about her experience. It's a delightful blog, chronicling classic muffin recipes. You can read along too: 67 Days in the Past.


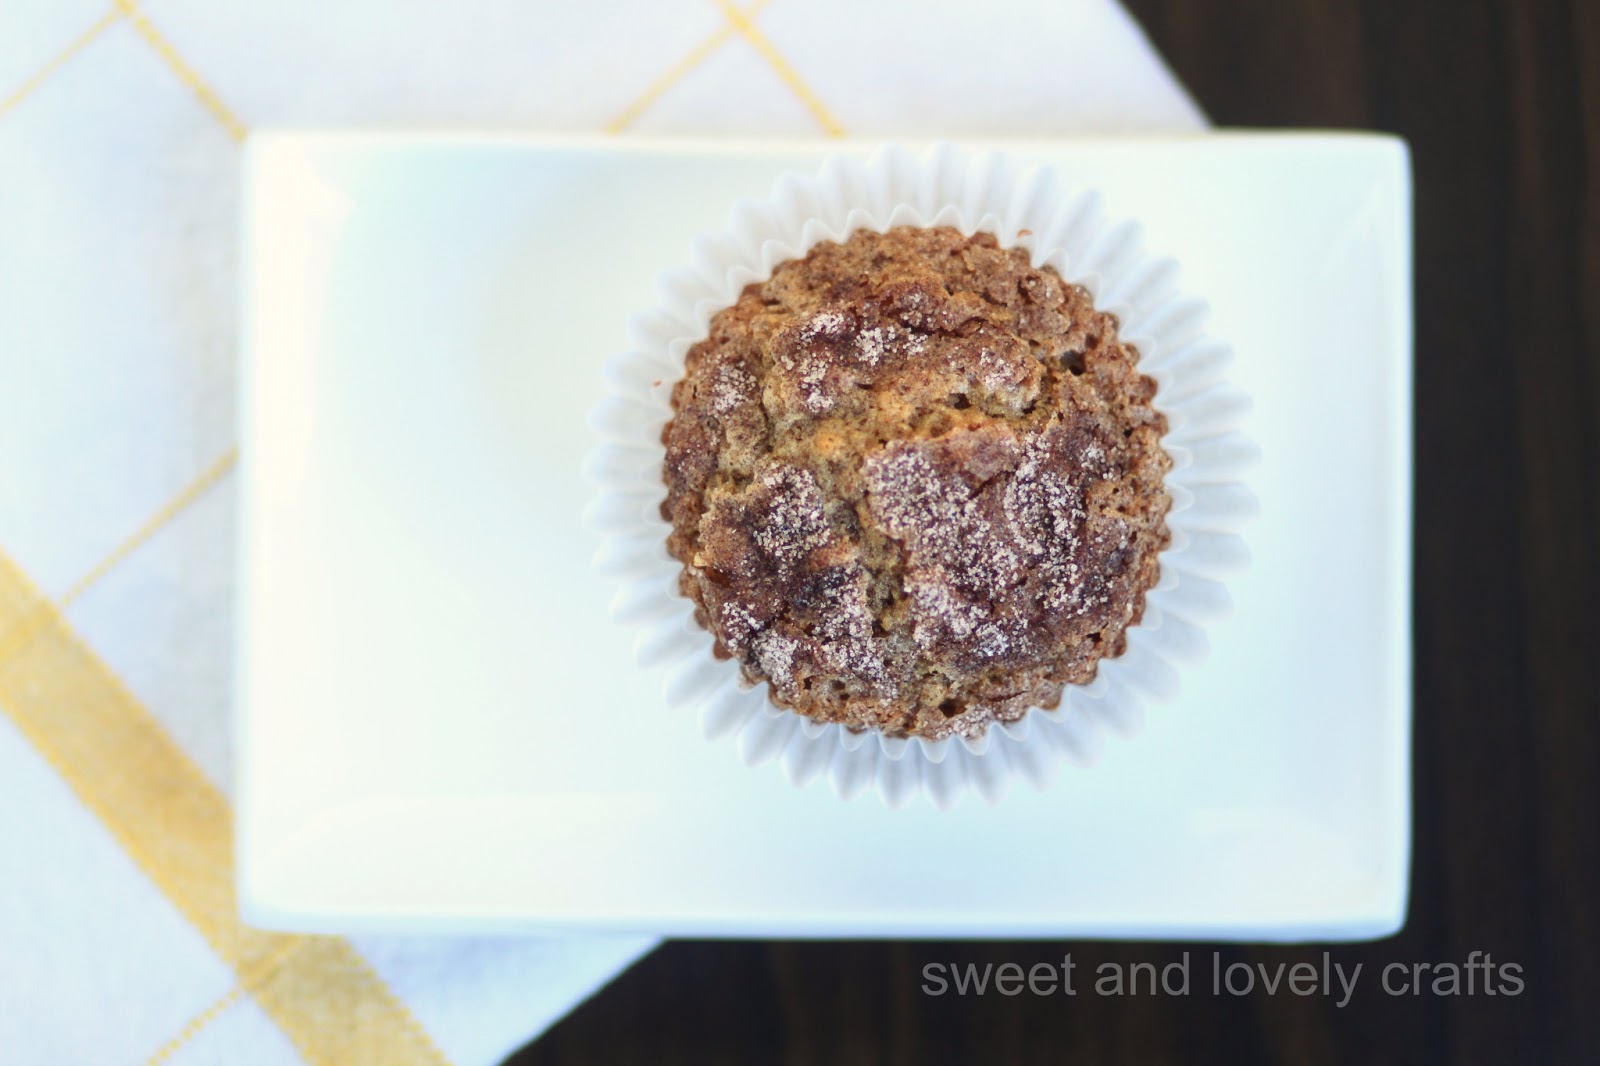
I first baked these muffins on Wednesday, and they were so good. By Wednesday night there were just two left. I baked another batch Thursday morning, adding in the cinnamon and nutmeg, which really give these muffins an extra kick. Check Hannah's original post to see what she added to her muffins for extra flavor.

Oatmeal Spice Muffins
adapted from Oatmeal Muffins


1 cup boiling water
1 cup oatmeal (not quick cooking oats)
1 cup packed brown sugar
1/2 cup butter
2 eggs
1 tsp vanilla
1 cup all-purpose flour
1 tsp baking soda
1 tsp cinnamon
1/2 tsp nutmeg
 cinnamon sugar

Mix together the water and oats, and set aside for 20 minutes or so.

In the bowl of a stand mixer, cream together the brown sugar and butter. Then stir in the eggs, and vanilla.  Add in the flour, baking soda, cinnamon and nutmeg. Stir just until combined. Gently stir in the oatmeal. Be careful not over mix. Spoon the batter into muffin cups, and fill the cups 3/4 of the way. Before baking, sprinkle the tops of the muffins with cinnamon sugar. Bake at 350 for 17-20 minutes.


Related Posts Plugin for WordPress, Blogger...