Monday, March 12, 2012

handprint giraffes

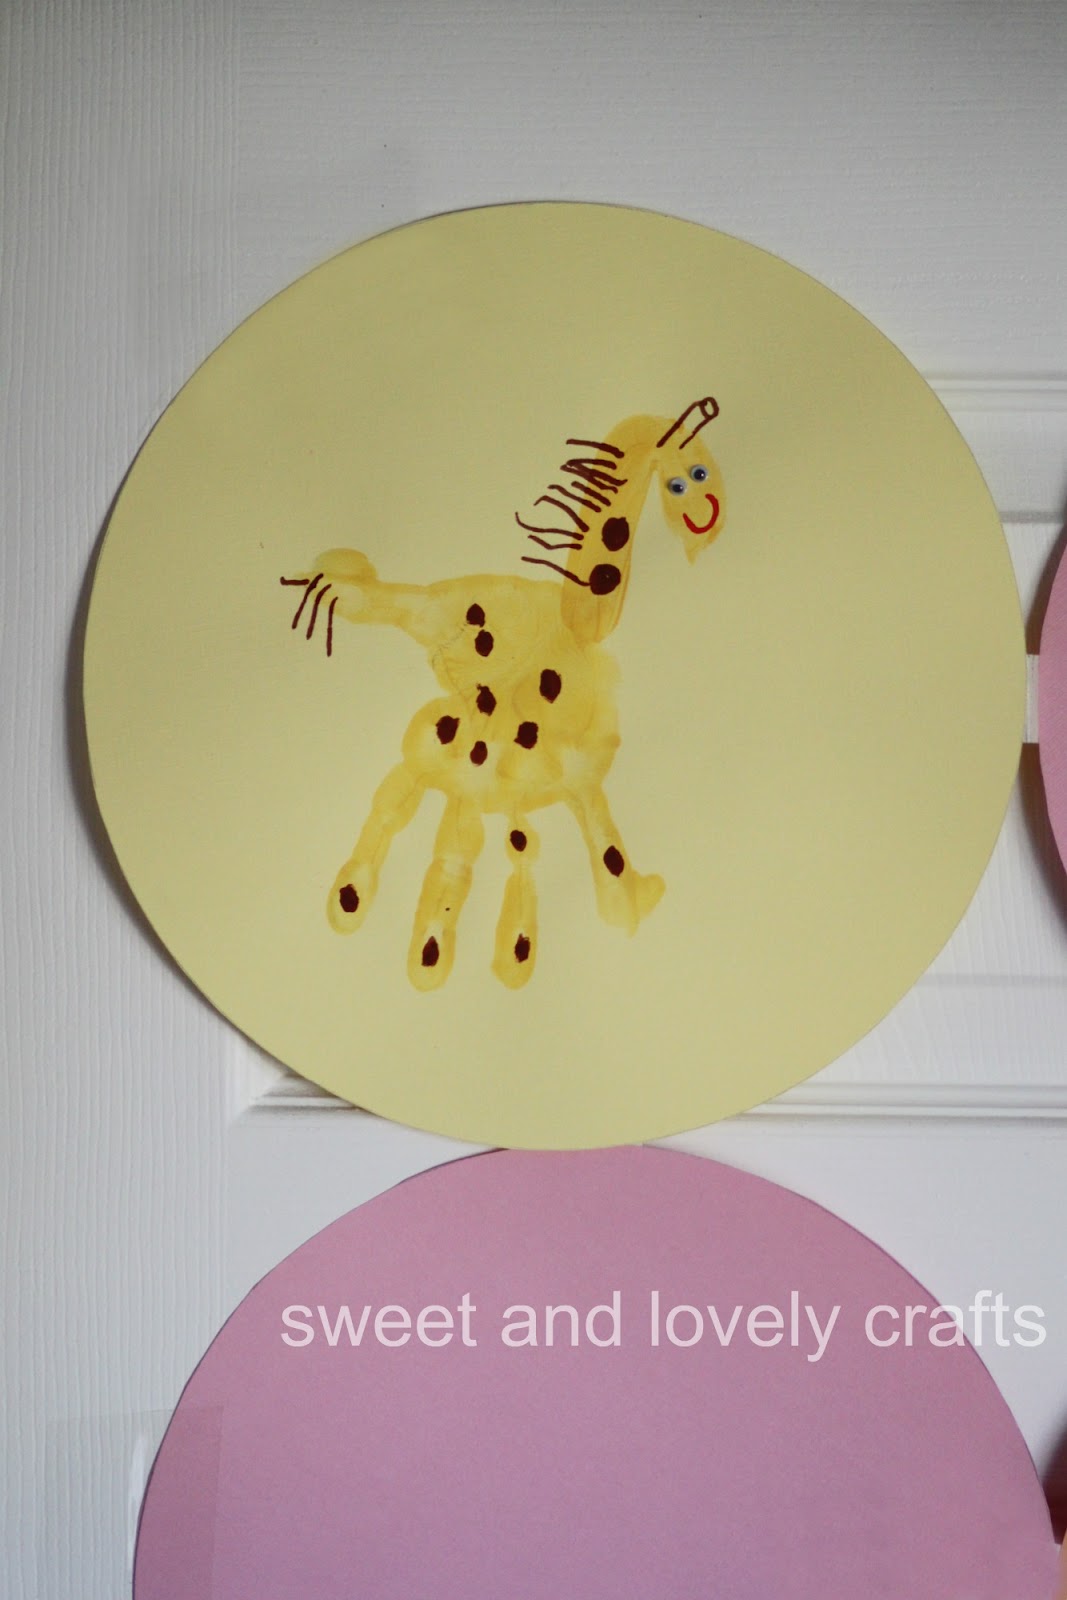
 This is the last of my giraffe related posts- I promise! We made these handprint decorations to cover the closet door behind the food table. (You can read all about Claire's giraffe themed party here.) They were an easy decoration to make, and an easy way to incorporate giraffes into the decorations.
 First add a bit of orange paint to the yellow paint, I just find that it makes the colour a little bit more bold. Then paint the hand of you child. Stamp on paper and let dry. Once dry I gave Claire a brown marker and asked her to draw the spots all over the giraffes. Then she drew some hair on the tail and on the neck. She drew the horn-like things on the giraffe's head (but apparently we forgot to draw the ears, whoops!) Claire used a red marker to draw the smile, and the glued on some googly eyes. 

That was it! So simple, and Claire loved doing it. And come on, who doesn't love handmade birthday decorations?!

Thursday, March 8, 2012

graham crackers- yum!


Remember these? These are the giraffe graham crackers that I made for Claire's birthday party. I mean, come on, when your daughter chooses a giraffe themed party you have to incorporate giraffes in any way that you can!

The kids love these crackers. I just made another batch for them. I'm going to double it the next time and try freezing a batch. These graham crackers are chewier than store bought ones, which are quite hard and crunchy, but the flavour is almost spot on.

Graham Crackers
(adapted from Haniela's Perfect Graham Cracker Recipe)

1 cup whole wheat flour
1 cup + 2 tbsp all purpose flour
1/3 cup + 1 tbsp brown sugar
¾ tsp baking powder
½ tsp baking soda
½ tsp salt
1 tsp cinnamon

6 tbsp butter, cubed

1/3 cup milk
2 tbsp orange juice
3 tbsp honey
1 tbsp maple syrup
1 tsp vanilla

Mix together whole wheat and white flours, brown sugar, baking powder, baking soda, salt and cinnamon. 
 

In separate bowl, stir together the milk, orange juice, honey, syrup, and vanilla.


Using a pastry blender (or two knives) add the cubed butter to the flour mixture. Once it has been cut in, pour in the milk mixture. Stir until combined. (I had to use my hands to finish mixing it all together.) If it seems really dry, just add a little more milk (or juice) until the dough comes together. Form into a ball, wrap in plastic, and chill for 30 minutes. 


Roll the dough out and poke all over with a fork. (I floured my countertop and the top of the dough.) Use cookie cutters to cut dough and place on a parchment (or foil) lined baking sheet. I used small cookie cutters, and mine needed to bake for 5 minutes at 350. Using small cookie cutters I was able to make about 120 cookies (40 per sheet). The small ones are perfect for the kids to snack on.

I'm pretty sure that my kids each ate about 20 crackers the first day that I made them. I love knowing what goes into the crackers that the kids are eating. What kind of snacks do you make for your kids to eat? I'm always looking for new snack ideas for my kids.

Monday, March 5, 2012

shamrock stamping


When I saw this toilet paper roll stamping project on Michelle's blog for Valentines day I knew that I wanted to try it with my kids. So I did. Unfortunately for me, Simon was more interested in smearing paint everywhere, immediately followed by putting his hands in his mouth. I've been a little hesitant to break out the paints again, but I was hoping that this time would be different. Lucky for me (must be that Irish luck!) it was.

I rolled out a long piece of white paper, and taped it to the floor. I squirted some green paint on some container lids (one for each of the kids) and gave them each a shamrock cookie cutter. The both did a great job stamping their shapes. After Simon had his shapes stamped he decided that it would look nicer as one big smear instead of discernible shapes.

The kids loved doing this and spent at least half an hour stamping and smearing. When involving a 1 1/2 year old in a project that involves paint, 30 minutes before nap time,  please make sure to MOVE their favorite-won't-go-to-sleep-without stuffed toys far far far away from the painting project. Otherwise, you may, or may not, end up doing a panic load of laundry, and delaying nap time for 30 minutes (or until the dryer is done.) That's just a note of caution for you, not that I actually know this from personal experience or anything :)

Tuesday, February 28, 2012

tissue paper shamrock art


It is hard keeping up with Claire, every time that I put Simon to bed she asks if we can do another project. This one was nice because she was able to do parts of it on her own while I was busy in the kitchen. Two separate projects inspired this one. My blogging friend Jill, made this for Valentine's Day and then I saw this project on Southern Lovely blog and I thought that a similar project would be perfect or St. Patrick's Day.

To start this one I used regular old masking tape to tape off lines on the canvas. I used a piece of masking tape as a spacer. Then Claire painted the whole thing green. Two coats probably would have had better coverage, but I was so anxious to see if the paint bled that I couldn't wait.

Once the canvas was dry, I traced a shamrock using a pencil. I used this template. I cut light green tissue paper into small squares. Then Claire squirted some glue on the canvas, and used a paint brush to spread it all out. Then she balled up each piece of tissue paper and stuck them on the canvas. She did a great job doing this part by herself. 

Monday, February 27, 2012

printable scratch tickets

With Claire's party over and done with for another year, we've started working on a few St. Patrick's Day projects around here. As I mentioned last year, my Mom's from Ireland, so we make a point of celebrating March 17 here! I've seen these make your own scratch tickets on Pinterest, and I thought this would be a perfect time to try it out. I used this tutorial to make the tickets.

I used a piece of packaging tape to cover my scratch tickets. Then, mix 1 part Dawn dishwashing liquid, and 2 parts grey paint. I painted the part of the ticket that I wanted people to scratch off. I used a dark grey paint, so it only took one coat for me. Also, I used a foam brush, which gave a much nicer coverage than a regular paint brush (trust me, because I tried both brushes).


Want to download these and make your own St. Patrick's Day scratch tickets? Click here to download. I included a few blank scratch cards so that you can write your own messages on the tickets. If you make these let me know, I'd love to hear from you.

Wednesday, February 22, 2012

St. Patrick's Day crafts

Who wants to start making some St. Patrick's Day now? While I put the finishing touches on some of my current projects, I thought that I'd dig into my archives (you know, all 1 year of them) and pull my projects from last year.

1. Why not start by making some thumbprint leprechaun bookmarks?
2. Followed by some wee little shamrock men.
3. Make a shamrock bouquet.
4. Top it all off with these amazingly delicious chocolate mint brownies. So good!


Tuesday, February 21, 2012

Claire's giraffe party

My first baby is turning four this week. 4?!?!! I can't believe it. But then, I'm sure I'm not alone in how fast our kids grow. When I asked Claire what kind of birthday party she'd like this year, she insisted on a giraffe party. Seriously? A giraffe party. We ended up making almost all of our decorations. I'm not sure how many of you have tried to throw a giraffe party- but there's not a lot out there to be purchased for one!

One of my favorite decorations were the circles behind the food table. I picked up a few sheets of 12x12 scrapbooking paper and cut them into circles. On the yellow ones Claire painted some handprint giraffes. (A more detailed post for another day!) My Mom and I tried to make the same ruffled streamers that we made for Simon's birthday party last year, but my sewing machine was having nothing to do with ruffles. They ruffled until I answered the phone, and then we just ended up sewing them together. They still looked pretty.
 In an effort to make her party more giraffe-y, we made some homemade graham crackers. We used a small cookie cutter to cut out small giraffe shapes. The kids LOVED these crackers. It was so hard to get them to stop eating the crackers so that we'd have some left for the party. This morning the kids ate the last of them. Recipe to follow shortly. You will want to make them.

 I also make some giraffe labels for the juice packs and water bottles.

I saw this cake in a Martha Stewart Baby magazine, way before I was even married. (I've always loved Martha, so I used to flip through her mags, even though I wasn't even thinking of babies yet.) I made this chocolate cake recipe, which I have used many times before. It's one of my favorite Martha recipes. The cake was baked in a 9x13 pan, and then using the template in the back of the magazine you cut the cake to form the giraffe. Unfortunately, this cake isn't on Martha's website.

 Here's the birthday girl! Mom and I made giraffe shirts for Claire and Simon. I cut the giraffe out using the cricut (thanks Sylvia!) and then just traced it onto the fabric. My Mom sewed them onto the shirts.
These pics were taken after the party was over. Simon is seen here holding the bowl that held the graham crackers. He ate them all afternoon.

It was a fun party. I ordered these giant (although I didn't know they were going to be quite so giant) balloons from Bargain Balloons. There's a flat shipping rate, and since I have already planned Simon's party, I was able to order balloons for his party too. I bought party hats and then covered them with construction paper. I printed out the giraffe image that I used on the water and juice packs to glue to the front of the party hats. 

Out of bristol board, I cut a giraffe (use your imagination!) so that the kids could play pin the tail on the giraffe. We also played a game called pretend you're eating like a giraffe. We my very awesome Sister, just threaded timbits (donut holes) on string and then hung the string from a broom handle. Then the kids had to try to eat the timbits without their hands (like a giraffe). 

Lastly, I made a spiced punch in the slow cooker to have on hand for the adults. It was so tasty. If you're going to make it, make sure you remember to take out the cinnamon and cloves after it has been in there for a few hours. By the time that I sat down to have some it was a little too clove-y.

There you have it- a full fledged giraffe birthday party. I love planning my kids birthday parties, but I'm a litle excited to have a bit of a break before the next party.


Related Posts Plugin for WordPress, Blogger...