Showing posts with label Halloween. Show all posts

Tuesday, October 29, 2013

Halloween lunches part 4

 I'm almost done making Halloween lunches and it's a good thing as I'm just about out of ideas :) I can't wait to start making Christmas/winter ones!

 I'd seen this idea on Pinterest, but I have no idea who thought of it first. To make this one I had to keep the fake teeth wedged in my spice rack for a few days so that they didn't burst out of the sandwich. When I made the sandwich, I just cut a hole in the sandwich and placed the teeth in the hole. I added some grapes, strawberries and apples to Claire's lunch.

 This was my attempt at a skull sandwich. Sometimes these things turn out so much better in my head than in actual execution. I used a piece of a fruit chew for his mouth and marshmallow eyes. I skewered some grapes, added in some blueberries (and my ghost cut out of a milk carton), and a chocolate chip cookie.

 I decorated a yogurt drink again for Claire's snack. We had made pizza for supper the night before and I rolled out the extra dough, cut out some pumpkins and baked them. I included those in Claire's lunch with some shredded cheese and peperoni. She also had some clementines, grapes, and a few smarties.

I think that this lunch was Claire's favorite one. I included a gingerbread waffle and a little bit of syrup for her to dip them in. I skewered a few grapes, and added in a few blueberries and strawberries.

Thursday, October 24, 2013

thumbprint witch


So a couple of years ago Claire and I made the footprint witch craft. This year we made a thumbprint witch.

What you need:
Card stock- I used white card stock cut into 3x4 inches (hello project life insert cards)
Cream and white coloured paint
Markers
Googly eyes (optional)

Have your child stamp their thumbprints on the card stock, one on top of the other one. See picture below.


Once the paint is dry, you can start to decorate it. I started by drawing the broom. Then I used the black marker to draw the witch's arms, legs, and hat. I added some stars and hair using yellow marker. I used a fine tip marker to draw the smile and nose. I finished it off with some googly eyes. There you have it. An adorable Halloween card or a super cute Halloween project life insert :)

Wednesday, October 23, 2013

footprint scarecrow

It's been a while since I came up with a hand print/foot print craft. This was inspired by some fall clip art that I came across on pinterest. Check out the inspiration here.

This was a simple craft to make since I just had Claire paint and stamp her foot, and then I added on the details. She painted her heel and toes a cream colour and the rest of her foot green. She stamped it on a piece of 12x12 white cardstock.

Once that was dry, I drew on the details, which I did using the kids Crayola markers.  I started by using a dark brown marker to draw the post that goes from the feet into the ground. Then I used it to draw the hat. I used an orange marker to draw the arms and a light brown one to draw the broom handle.  I used a light and dark yellow marker to draw all of the straw coming out of the scarecrow. I drew a little face and some small patches on the scarecrow body.

Happy Fall!

Tuesday, October 22, 2013

halloween lunches part 3

Claire had a short school week last week because of the Thanksgiving holiday, so she only had four lunches last week. I didn't realize how similar the lunches looked until I saw them all together here! I might have to start packing her lunches the day before. It's so dark here in the mornings, it's hard to get good light to photograph them. It also speeds things along in the morning if I don't have to worry about packing her lunch as well.

See previous weeks lunches here and here. Thanks to everyone who pinned my lunches from last week. It was exciting to see them pinned so many times in just 1 week!
This was one of those mornings where I was quite rushed packing her lunch! I cut her sandwich into a circle, and cut some ghosts out of a fruit chew to decorate her sandwich. I added in some strawberries, raisins, and an applesauce.

I started by cutting Claire's sandwich into stars. I have nesting star cookie cutters, so I picked out a few sizes for the sandwich. She also had some tortilla chips and clementines. The blueberries were skewered on the skull picks that I bought from Target. I made Rice Krispie squares in a mini muffin tin to include in her lunch. I made half a batch of the Rice Krispie squares, and after I greased the pan, I shook in a few halloween coloured sprinkles. Then I smooshed in the Rice Krispie bits.

Claire really like this lunch. There was a sandwich cut in the shape of a pumpkin, with grapes and an apple on the side. I added in a granola bar (homemade) for her snack. I love all of the picks that people add to their kids lunches, but I haven't ordered any yet. I cut these ghosts out of a milk carton to add to her lunches.

Lastly, I had picked up a package of halloween rings from the dollar store. Because they're so cheap, the ring back pop off, which makes them super easy to add to lunches! They snap back on so that the kids can wear them too. I cut Claire's sandwich out in a circle and added a spider for decoration. Then she had a clementine, some strawberries, and some goldfish crackers.

All these lunches are packed in my EasyLunchboxes containers, which I just love. Everything that I send for Claire fits in this one container. It just makes it so easy! (This is not a sponsored post, I just love their product.)

Linked up with: Tatertots and Jello, Kitchen Fun with my 3 Sons, Six Sisters, Skip to my Lou

Monday, October 14, 2013

fall & halloween lunches part 2

Fall and halloween lunches continue! If you missed the first round of lunches you can check them out here. We've got a short week of school this week, since it's Thanksgiving here today. Check back in later this week to see a few halloween crafts.

No special tools required for this lunch. I just cut the crusts off of Claire's sandwich (who likes the crusts anyway? Not me.) and then cut the sandwich in half, making a zig zag cut. I just used a sharp knife to do this. Candy eyes are fine, but I prefer to cut a mini marshmallow in half and stick a chocolate chip to the marshmallow. I skewered a few blueberries, added in a few grapes and an apple.

I used a pumpkin cookie cutter to shape the sandwich. I added in a few grapes and a clementine. I drew a pumpkin-esque face on the package of peaches (packed in water). I added in a few halloween smarties for a treat.

I used a ghost shaped cookie cutter to cut Claire's sandwich and added on marshmallow eyes. I gave her a clementine, some raisins, and some tortilla chips as a treat. Lastly, I drew a Frankenstein face on her applesauce container.

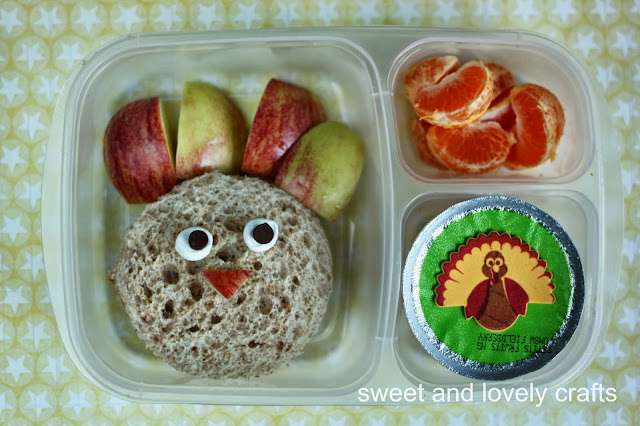
This one looked a little bit better in my head than it actually turned out- but alas, Claire ate the whole thing. The sandwich was supposed to be a turkey, as it's Thanksgiving here this week. I just put a foam sticker on the applesauce to make it a bit more festive.

This was my hand at making lunchables. I gave Claire some vegetable Breton crackers, a few pieces of ham, rolled and skewered on skeleton skewer and some shredded cheese. Because that's how Claire likes to eat her cheese, shredded. I put a little ranch dip in the container for the carrots and added in a few grapes.

Linked up with: Tatertots and Jello, Kitchen Fun with my 3 Sons, Six Sisters, Skip to my Lou

Tuesday, October 8, 2013

fall & halloween lunches


Claire just started school this year and she is loving it. She's in French immersion and it's amazing how quickly she's picking up the language. Because we live so close to the school, I get to drop her off and pick her up every day, which means I get to see my friends everyday!

Just before Claire started school, I announced on facebook how excited I was to start packing school lunches. This caused outrage, as apparently, this in not common among my friends. I don't dare announce that I still love doing it a month into it.

For the month of October, I decided to do a month of fall & halloween themed lunches. To be honest, I'm sure Claire doesn't care what the lunches look like, but it makes it more fun for me when I set challenges like this. I am using EasyLunchboxes, which I just love. Everything that I send for Claire fits in this one container. It just makes it so easy! (This is not a sponsored post. EasyLunchboxes don't know who I am, I just love their product.)

This lunch was a Wow butter sandwich (no peanut products allowed in our school), some sliced apples, pumpkin mini donuts, and an organic cereal bar for her snack. I used my Wilton leaf cookie cutter to cut the sandwich.

When I actually include an ice pack in Claire's lunch, I like to make it count. So this lunch had some star shaped, ham sandwiches, a vanilla yogurt drink, carrots and ranch dip, and some crackers.

For some reason, Claire is obsessed with these packages of applesauce. I think that she saw someone else have them at school. Probably because she can eat them so quickly and then spend the rest of her time playing. This was a sandwich cut into the shape of a pumpkin, a clementine, some chocolate goldfish crackers and an applesauce.


For this lunch I cut the sandwich into a circle. Then I used a Wilton cupcake topper for decoration on top of the sandwich. I skewered a few grapes onto the skeleton picks that I found at Target. I packed a clementine, and some oatmeal spice muffins for her snack.

Linked up with: Tatertots and Jello, Kitchen Fun with my 3 Sons, Six Sisters, Skip to my Lou

Monday, October 29, 2012

Halloween party!


We hosted a little Halloween party here this afternoon. I planned almost everything from ideas that I had seen on Pinterest.

I made banana chocolate chip muffins and used these cupcakes toppers that I had picked up last year from Winners. (Made by Wilton) Want the recipe? I used my Best Banana Muffins Ever recipe found here.

I love these stickers that Claire and I stuck to the bottom of these Hershey's Kisses. Is anyone else excited that they changed the formula for the kisses? I think they are delicious now! I found the printable here.


I baked sugar cookies on popsicle sticks and decorated them to look (sort of like) mummies. These were a big hit with the kids, I mean come on, cookies on sticks?! That's where it's at.


I put a bit of floral foam in the bottom of these containers that I picked up at Dollarama to hold the cookies.


 Sticking with the mummy theme, I wrapped up a few juice packs using white electrical tape and googly eyes. I also decorated cookies that had been cut with a gingerbread cookie cutter to look like mummies. I used M&M's for the eyes.

 One of my favorite things that I made was this banner. I used my cricut to make it. I cut 5" circles out of black cardstock, and then cut all of the letters on white paper, using my Opposites Attract cartridge.


I've seen a few variations of this on Pinterest. I didn't want to have to cut everything by hand, so I cut the only shapes that I could find on Cricut cartridges. Luckily, my friend Sylvia, had a few cartridges that I could borrow.  I taped all of the black paper to some fishing line and hung them up between the two posts.


 A while ago, I placed another order from Bargain Balloons. I went in on an order with a friend so that we could split the flat shipping rate. I just love the selection of balloons, and you cannot beat their prices. (That is not an affiliate link. Bargain Balloons don't know who I am, I just love their site!)


  My last bit from the party was another printable that I found on Pinterest. (Seriously, where did I come up with ideas before Pinterest?) The tags say "A bit of light for Halloween night." I found this printable here.


Claire was dressed up like a horse. (Lucky find this summer while my sister and I were yardsaling!)

Simon was dressed up as Super Simon, cute kid by day, and superhero by night!

Monday, October 8, 2012

spider thumbprints


We made a lot of Halloween thumbprint crafts last year, but this one is a little different than those ones. Obviously, we started with a piece of cardstock, and Claire stamped her thumb a few times. Once the paint was dry, she drew eight (ish) legs on the spiders and added small googly eyes. Then I cut some of my bakers twine to act as the sipder's webby stuff. I stapled the twine at the top of the page, and secured it at the top of the spider with a small spot of glue. I cut out a purple piece of cardstock, and then a slightly smaller piece of orange paper for the flag. Claire wrote the word 'eek' on the paper, and I used double sided tape to attach it to the finished product. These would make really cute Halloween cards.


Monday, October 1, 2012

toilet paper stamped pumpkins

 This was one of Claire's favorite crafts. Simon enjoyed it too. He loved stamping the pumpkins on the paper, but not as much as he loved painting his little hands and smearing them all over the paper!

Save your next toilet paper roll, because that's what you'll need to stamp the pumpkins! When I first saw Michelle's post about using a toilet roll to stamp hearts, I thought that it was a great idea. The paper rolls are so easy for the kids to hold and use. Simon is 2, and he was able to stamp these with no problem. I gave the kids a couple of sheets of white paper and had them stamp lots of orange circles on the paper. (I just poured some orange paint on a piece of tin foil.) Once all of the stamped circles are dry, have a child draw the stems on the pumpkins. 

Materials needed:
paper (I used cardstock)
orange paint
green & black crayon/marker
googly eyes
orange tissue paper
orange sparkly paint (or glitter if you like cleaning up the glitter mess)

Of course, the best part of my list above is that you can just use what you have on hand. No tissue paper? Don't make those pumpkins.

For the sparkly paint pumpkin, I mixed some white glitter paint with the orange paint. I had planned to use glitter, but then I remembered how much I hate cleaning up glitter messes. This was perfect, Claire loved the glittery paint. 

For the tissue paper pumpkin, I cut out squares of tissue paper for Claire. No need to be exact cutting these, just cut them 1inch-ish by 1 inch-ish. Claire crumpled them into balls, and then glued them on her pumpkins. 

For the last two pumpkins, Claire drew the faces on the pumpkins. On some of the pumpkins she glued on googly eyes, and the others she drew triangle eyes. She had a great time drawing scary, happy and surprised faces. 


How's that for a festive Halloween craft? Break out the toilet paper rolls, and show me what you've made with them!

Monday, September 10, 2012

Fun Fall Crafts

Welcome back, blog friends. I didn't intended to take a month and half long hiatus from my blog, but between returning to work, and a fairly uninspired crafty summer, I didn't have much energy to blog. Not to worry though, fall is one of my favorite times of the year. We've already done three new projects this weekend! While I prepare those projects to post, I thought that I'd round up my favorites from previous years. Enjoy!

1. Handprint turkeys
2. Free printable of fall activities
3. Footprint fire trucks
4. Footprint flying witches
5. Halloween subway art
6. Best ever banana muffins
7. Leaf print hungry caterpillar print
8. Halloween bouquet
9. Halloween thumbprint art (see below)


Thursday, October 13, 2011

Halloween thumbprint art


What's great about thumbprint art is that it is so quick and easy to do. Also, there's very little mess involved, which isn't really true for all of the other painting crafts that we do! I did so this project in stages- since my daughter has given up naps, time isn't as affluent as it once was. Man I miss those naps.

I started by first cutting out the scalloped circles and the happy Halloween letters, using my cricut. Then, after the kids were done eating supper one night, we painted all of the thumbprints on the tags. Once the tags were dry, Claire and I added on all of the details on the tags. 
Then all I had to do was put it all together. I picked up the frame at a second hand shop and painted it white. The cork board is from the dollar store. I cut it to size, and taped it to the back of the frame. (Claire's not napping anymore- I didn't have time to put it in properly.) Next, I glued on my happy Halloween letters and added a piece of patterned paper to break up the picture a bit. I just stuck the pins on the cork slipped the circles over them. 

Want to see some close ups of the pictures?

The pumpkins. As Claire is getting older she's wanting to help me add all of the finishing touches to the pictures. She drew the stems.


The ghosts. We just added googly eyes once they were dry. 
 The spiders. I did encourage Clarie to draw 8 legs on each spider, perhaps even 4 on each side of the spider- BUT Claire beats to the sound of her own drum apparently.
 The bat. I cut off the wings from one of the bats that I had cut out from my Halloween bouquet. Draw on ears and a smile (my kids are still small, so we make friendly bats and witches!) Add some googly eyes and you're done!

What sort of projects are you making for Halloween? Link them up in the comments so I can see them!


Related Posts Plugin for WordPress, Blogger...